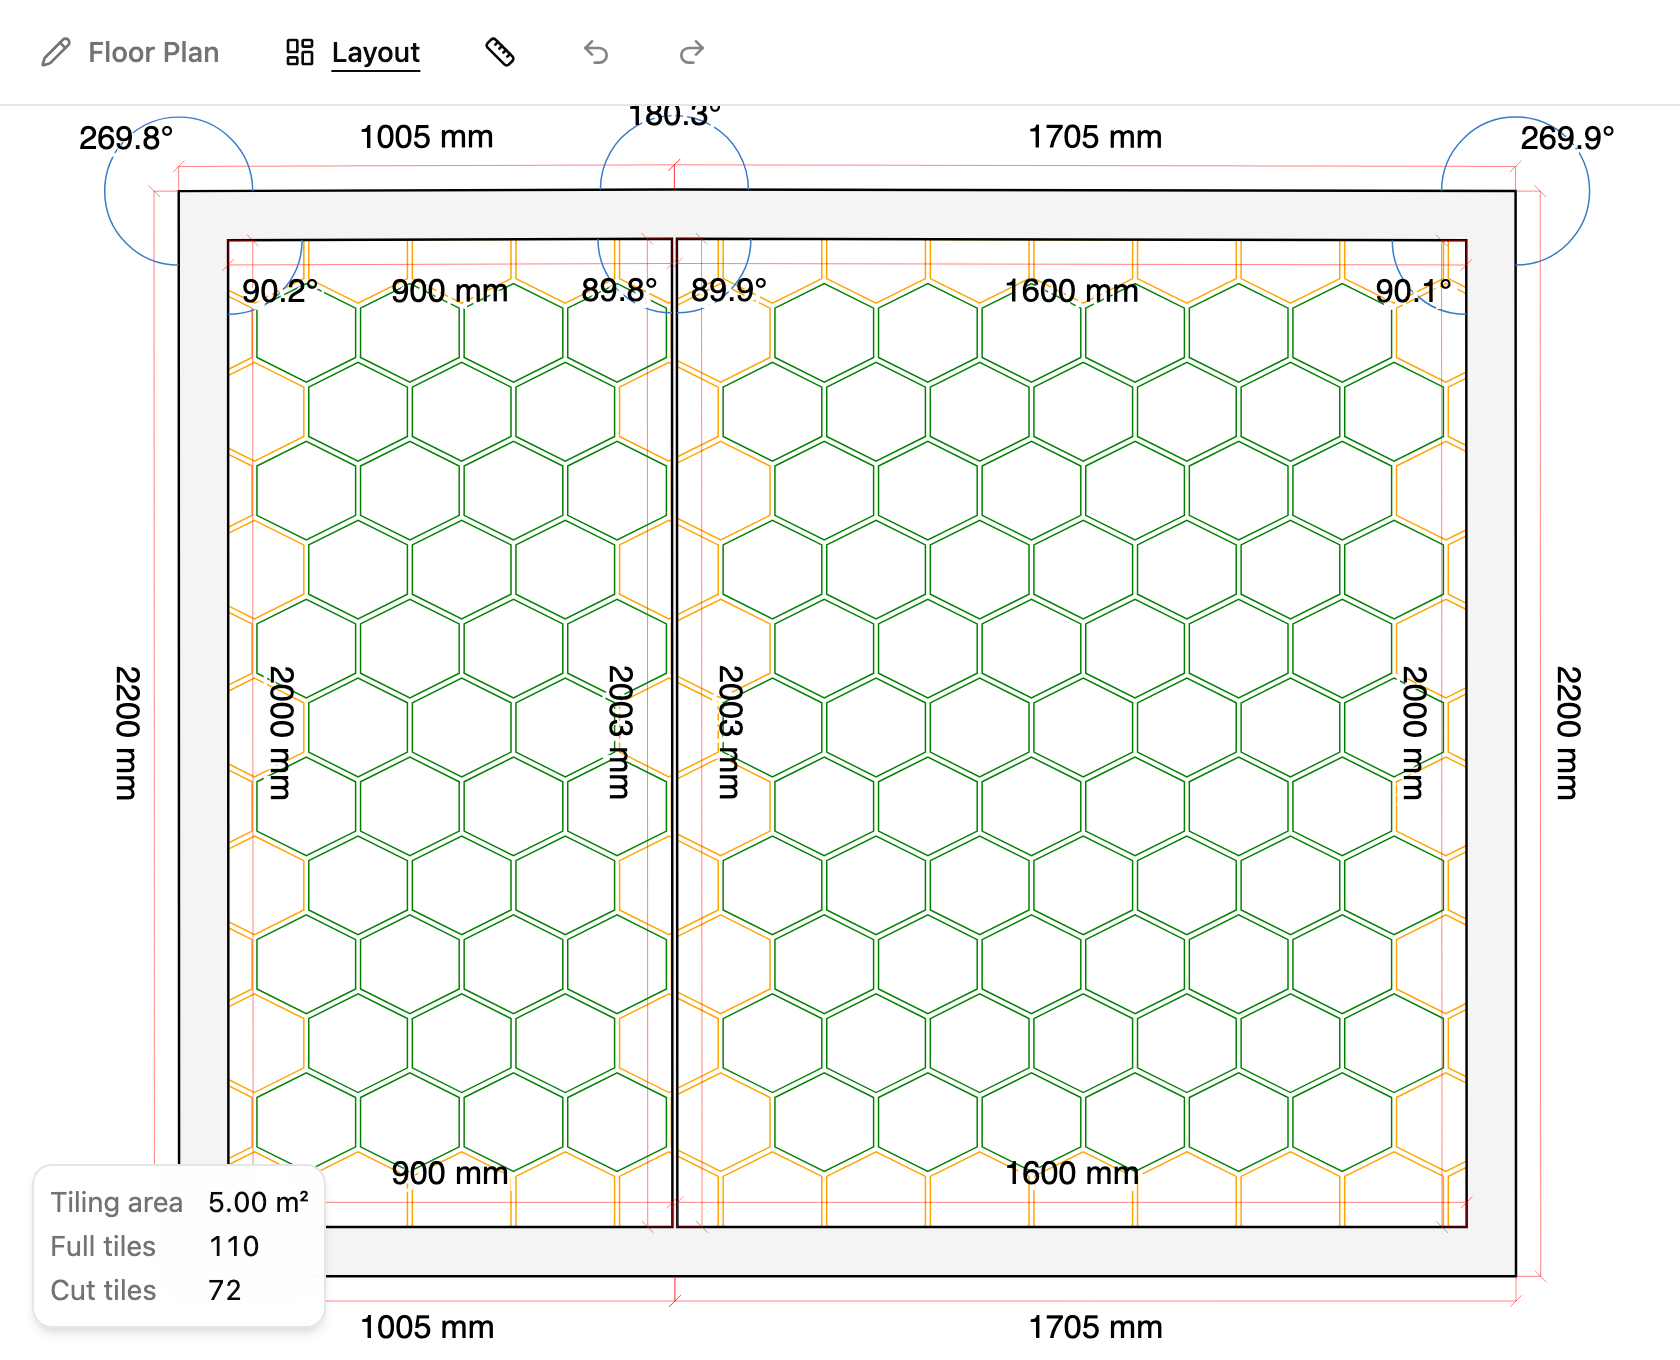
Layout a shower
Model two perpendicular shower walls as one flat elevation, mark the corner join with a thin wall, then preview hex tiles across both surfaces.
8 min read · 5 steps
Draw the outer rectangle
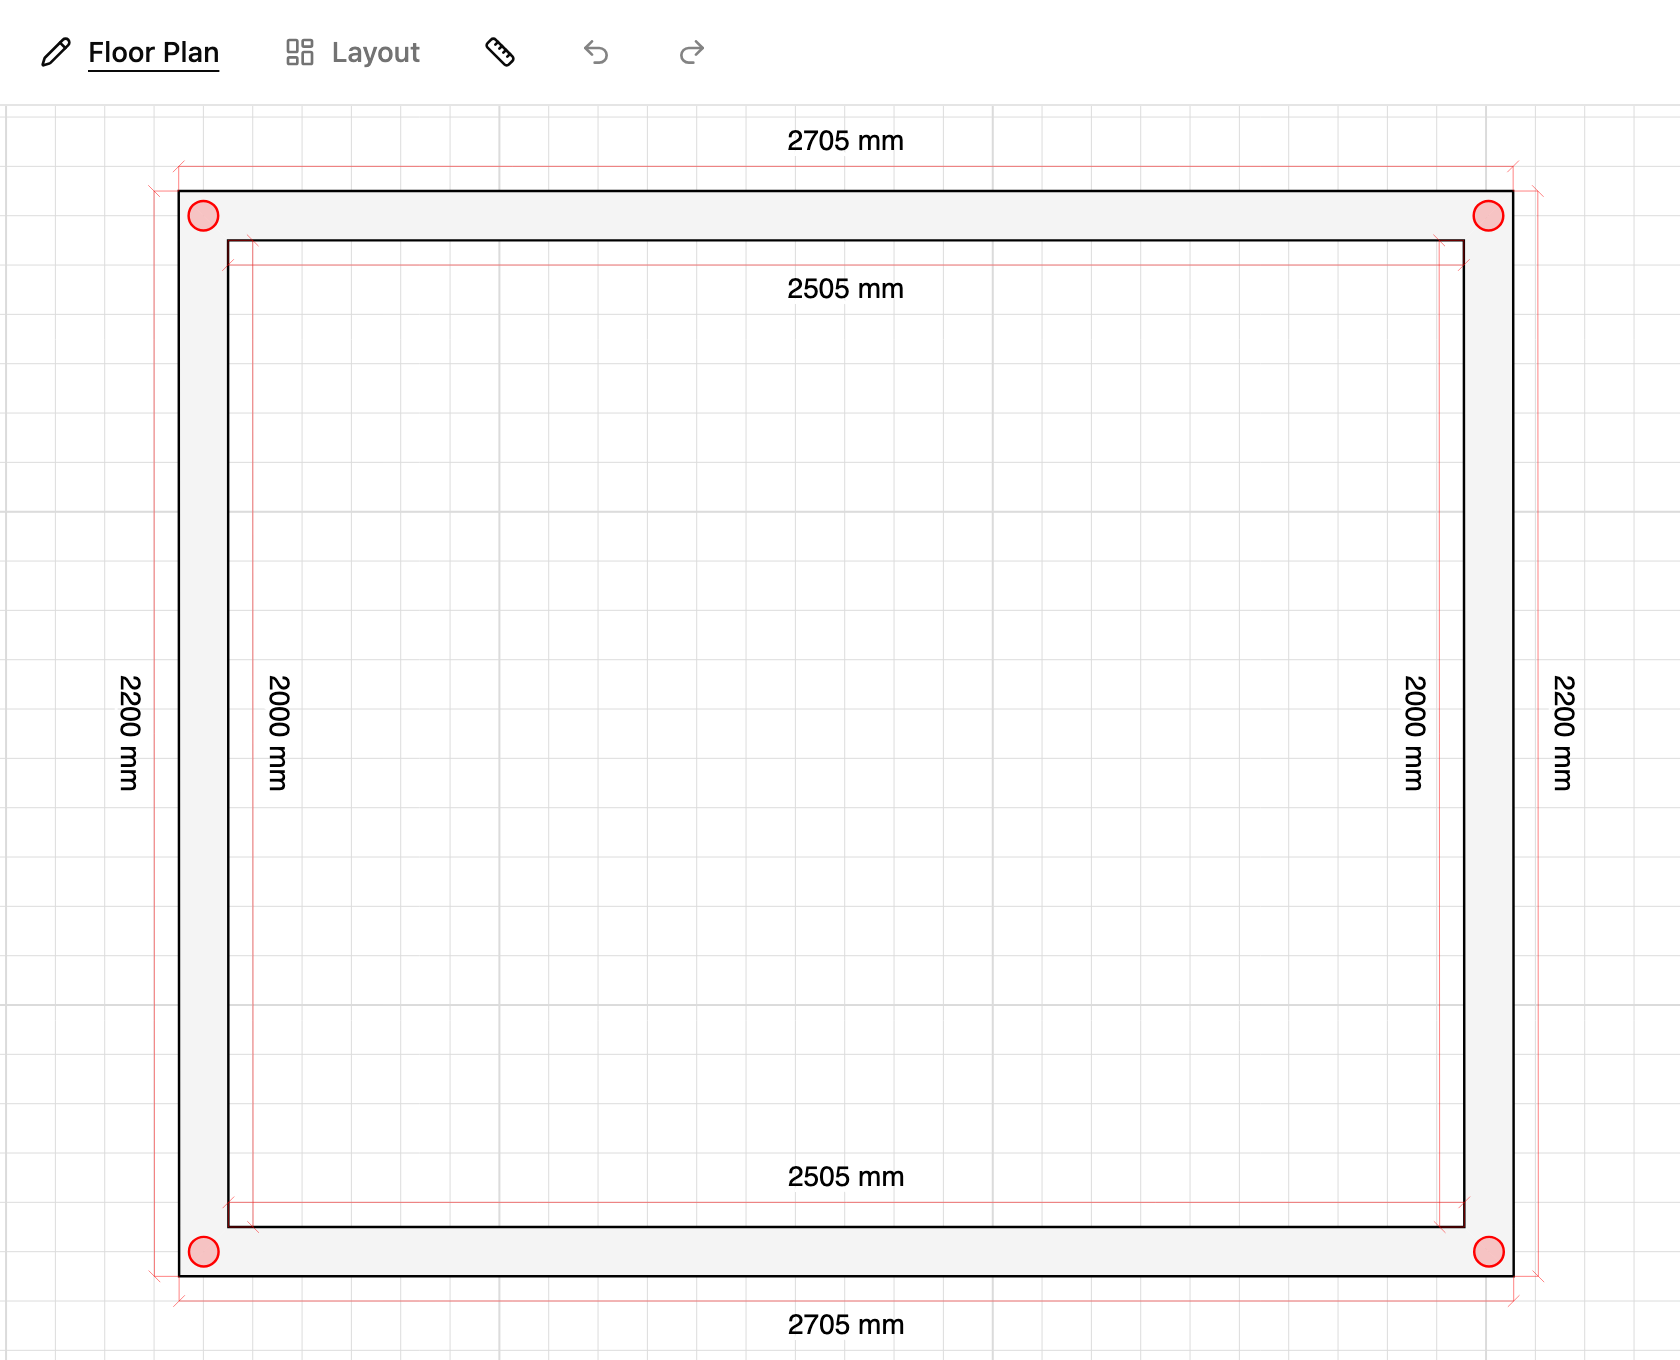
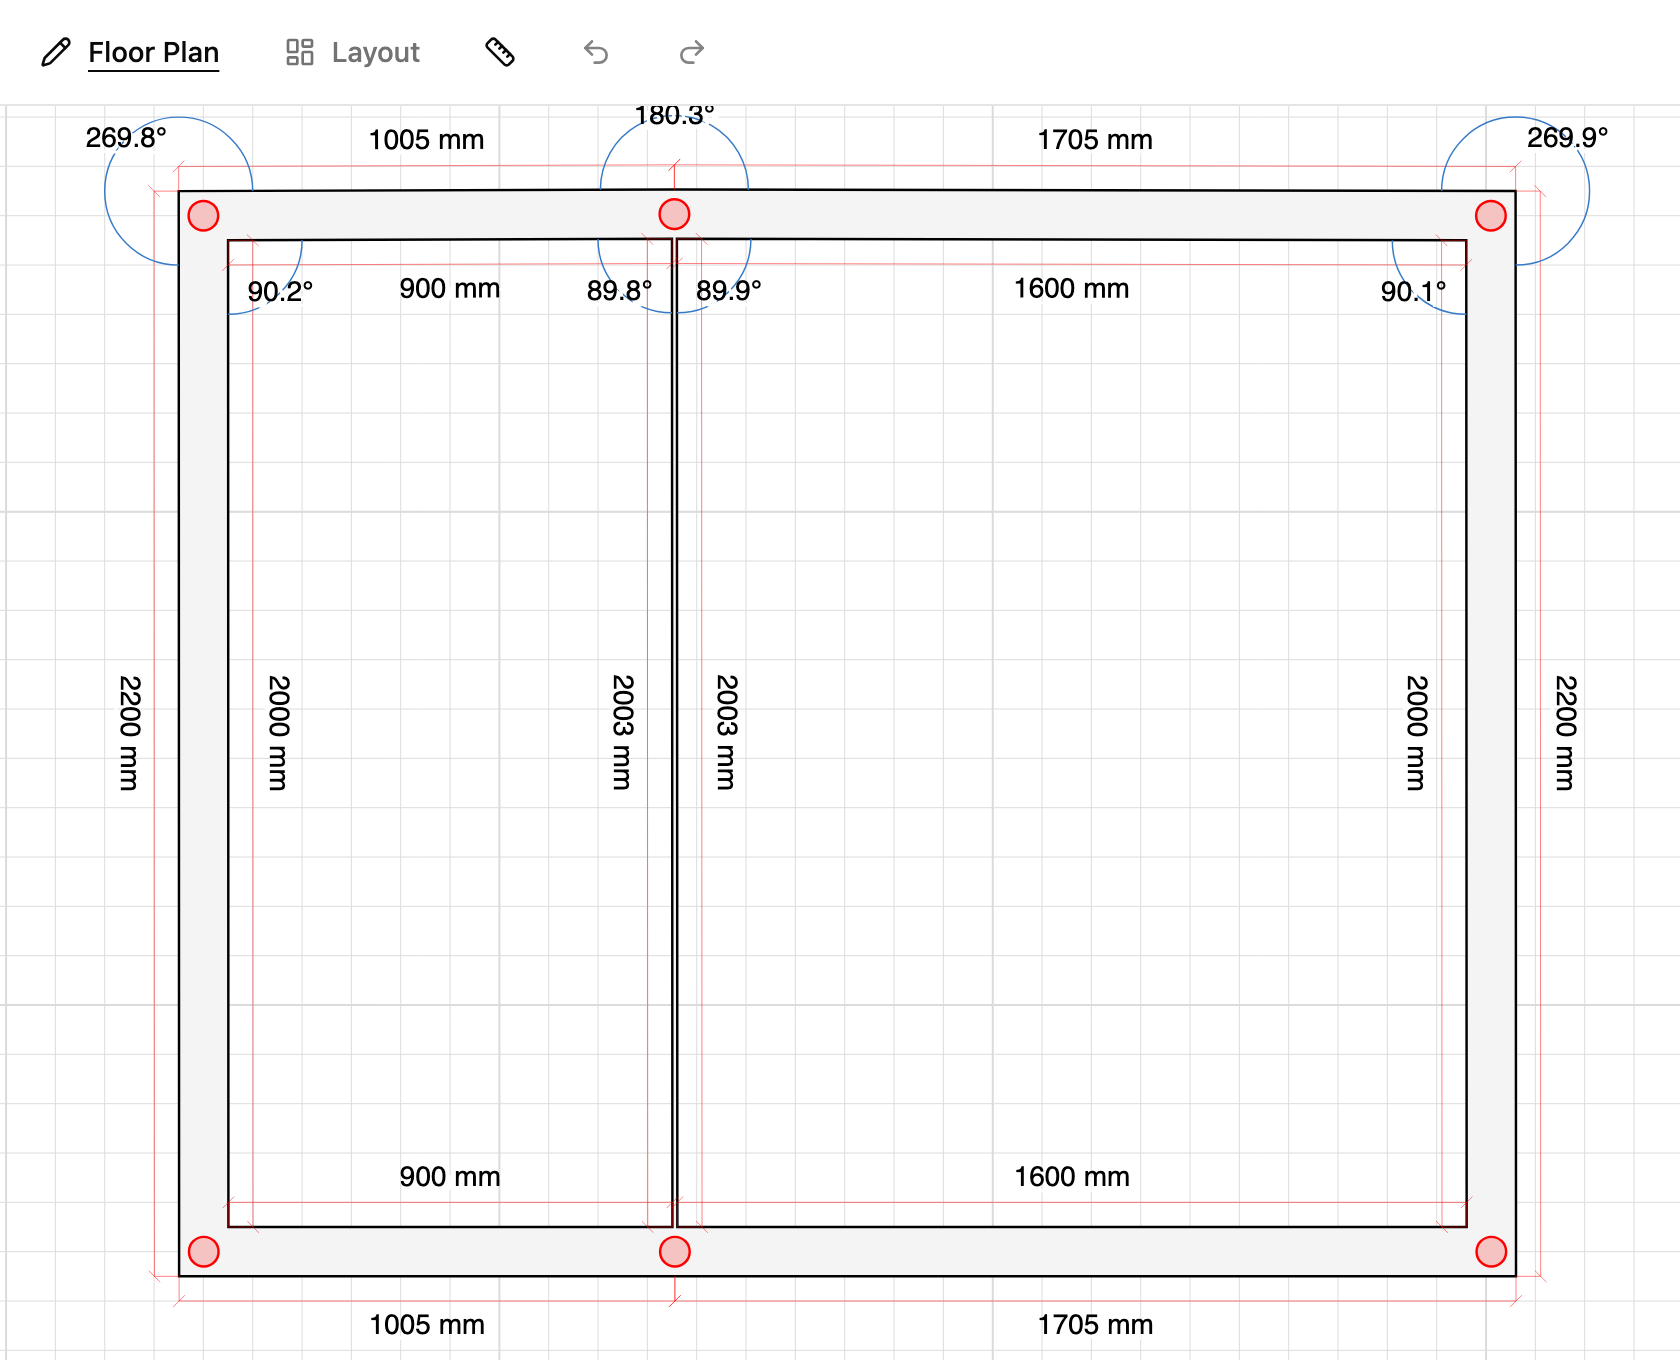
In Floor Plan mode, treat the canvas as an unwrapped elevation: two perpendicular shower walls laid flat side by side. One wall is 1600 mm wide, the other is 900 mm wide, both are 2000 mm tall. Draw a rectangle 2510 mm wide (1600 + 10 mm grout join + 900).
Add a thin wall for the join
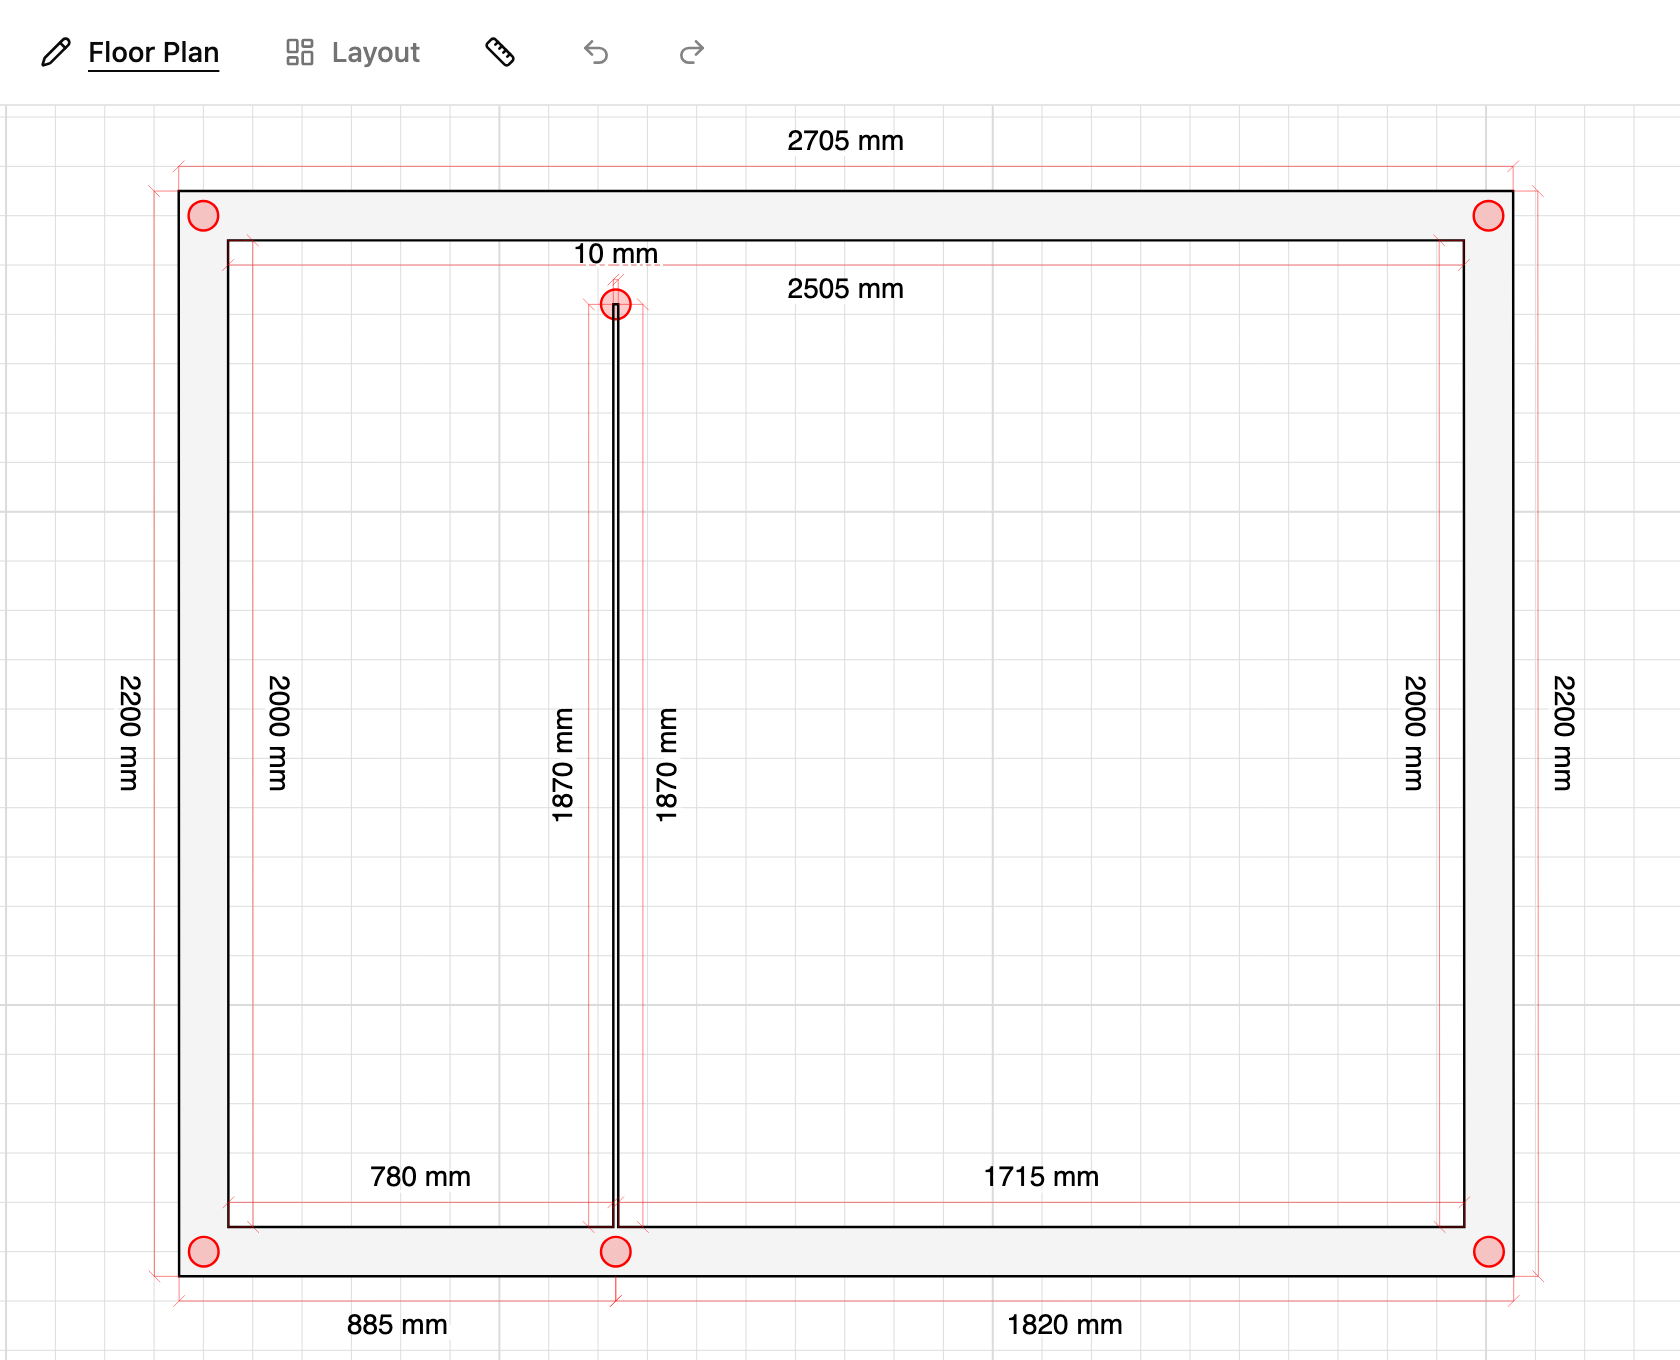
Click a wall without dragging and choose Add Wall. Add a short perpendicular offshoot with minimal thickness — 10 mm matches the grout line where the two real shower walls meet at 90°. This thin strip separates the two tiling areas on your flat plan.
Join the walls
Drag the free corner of the thin offshoot onto the opposite boundary wall, about where the two shower surfaces should meet. You now have two tiled surfaces separated by a thin grout join.
Check the shower dimensions
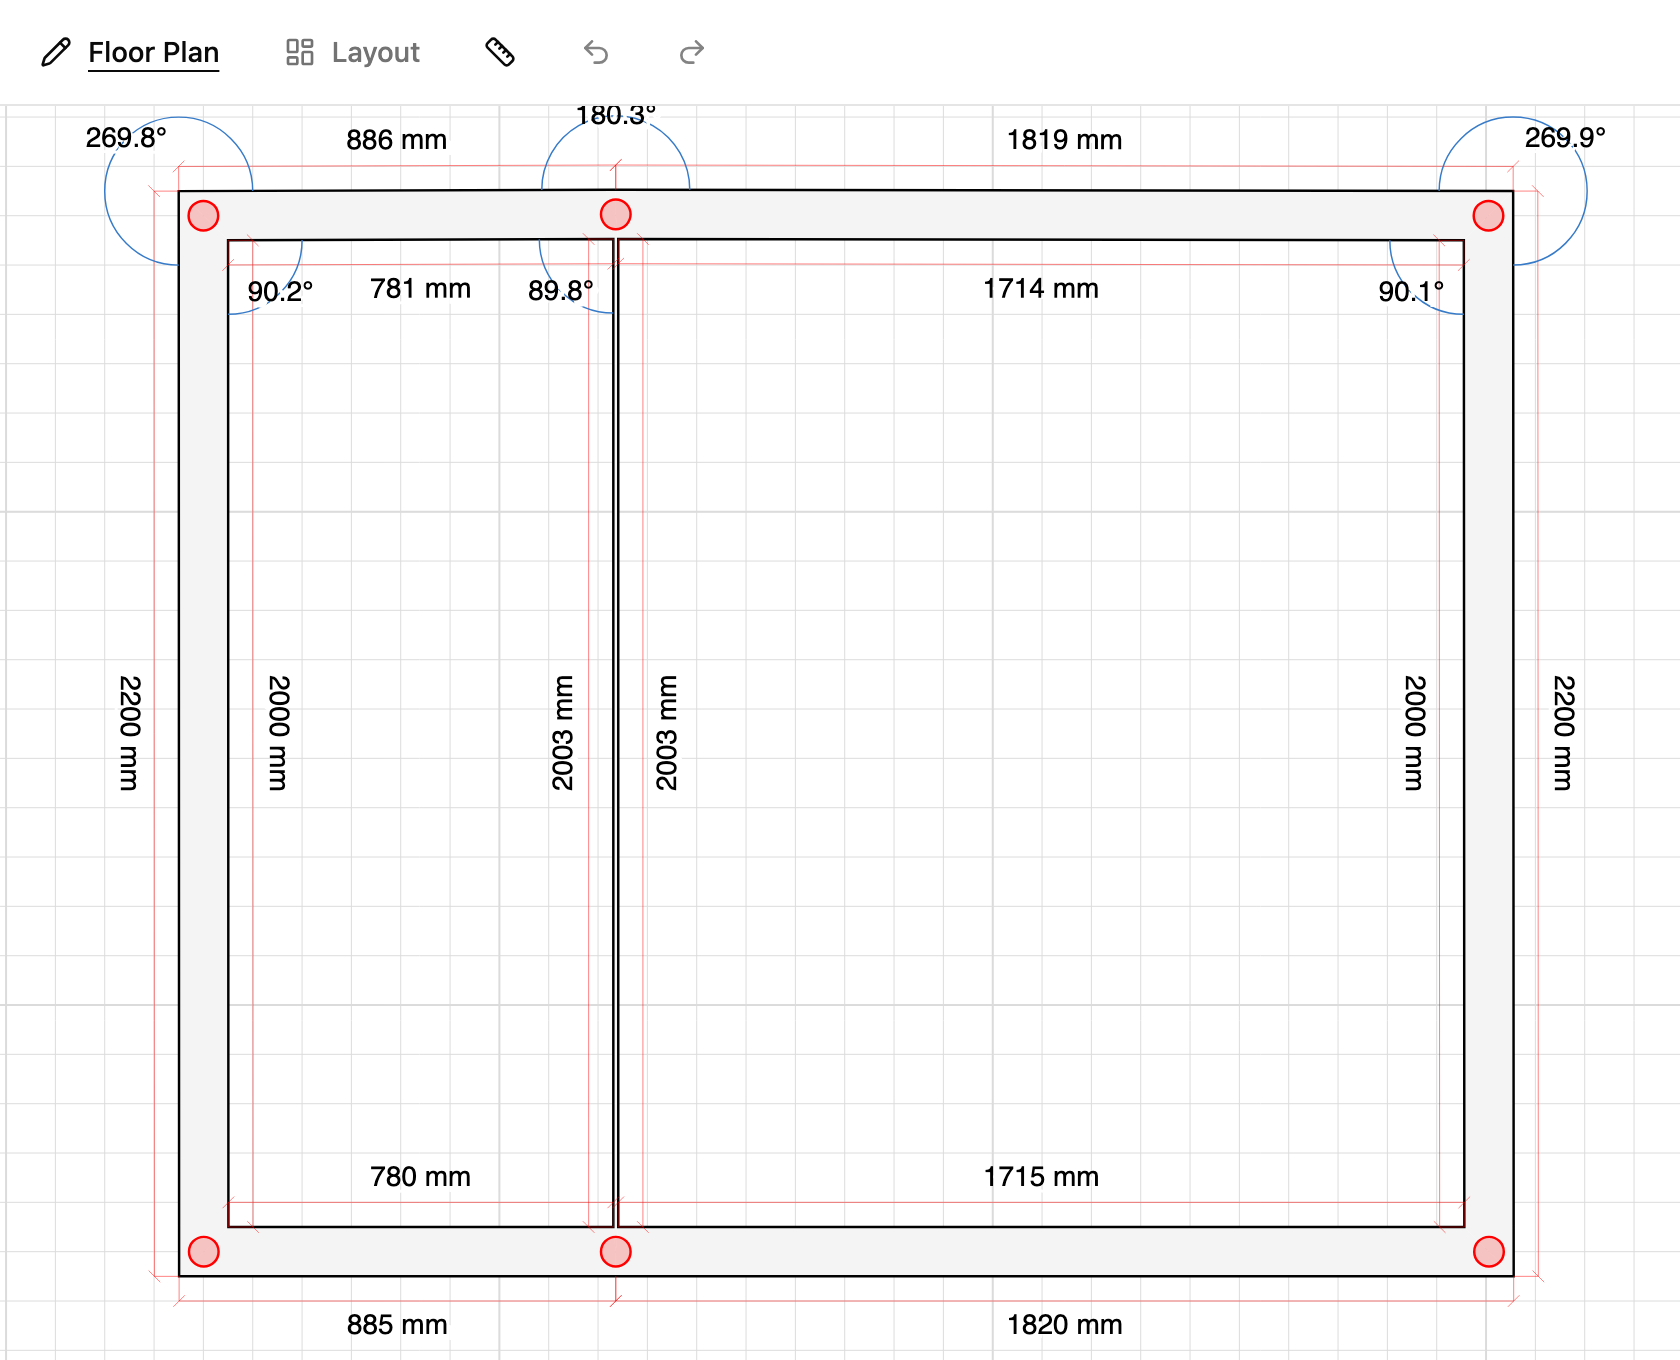
The walls won't be perfect so resize each zone to match your site measure: 1600 mm and 900 mm for the two shower walls. Click any label to adjust a length.
Preview hex tiles
Switch to Layout and pick a hex tile and pattern. The preview spans both shower walls on your unwrapped plan so you can judge cuts at the grout join before you set out on site.